Build a Twitter Bot using Postman and JavaScript💻

Building FrontendPro || Frontend Developer
Have you ever wondered how to create a Twitter Bot? You may have seen bots that can do things like Like tweet, retweet or reply to tweets and wondered how they are built.
In this blog series, you're going to learn how you can create your own Twitter Bot using Postman and JavaScript that can Like, retweet, and reply to tweets using a hashtag. We'll use a Twitter API and Postman to build this Twitter Bot.
A few months ago, I participated in Postman API Hackathon. During this Hackathon, we were asked to make Hacks using Postman. I chose ( Smart Sharer and Twitter Bot ) as my two hacks. It was a lot of fun creating these two things and I learnt a lot of things about Postman while building these two hacks!
If you don't know about Postman, what it's and how does it work? I'll tell you everything you need to know about Postman.
This article is part one of a series of three parts that will cover how to set up your Postman API tool and get a Twitter API key, before diving into writing the code for our bot.
What is Postman?
Postman is an API development tool that helps to build and test API's. You can use Postman to send different types of requests like GET, POST, PATCH, UPDATE, etc. In this tutorial, we're going to use Postman to send requests to different Twitter API endpoints and we will also use Postman monitors(a really cool feature) to automate the process.
You can download the latest version of Postman from here or you can use Postman Web App.
Basic term I'm going to use:
- Collections: Postman Collections are a group of saved requests you can organize into folders.
- Workspaces: Postman Workspaces allow you to organize and collaborate on API projects with your team. Within each workspace, you can share APIs, collections, environments, and other components of your work in Postman.
When you first open Postman, you will be in your default personal workspace, but you can create more workspaces for your personal use and to work in conjunction with teammates.
- Environment: An environment is a set of variables you can use in your Postman requests. It's similar to the .env file where we usually store API keys or more sensitive data. You can easily store key-value pairs inside the environment variable.
Hopefully, you understand all the basic terms that I explained above.
So, without any further adieu, let's start building a Twitter Bot using JavaScript and Postman.
Start building it! 💻
Create a Public Workspace
First, open your postman and create a new workspace

Then name it Twitter Bot(or give it a more creative name) and select the type Personal to create a personal workspace or you can also create a Public workspace that's visible to others and then click on the Create Workspace button to create a new workspace.
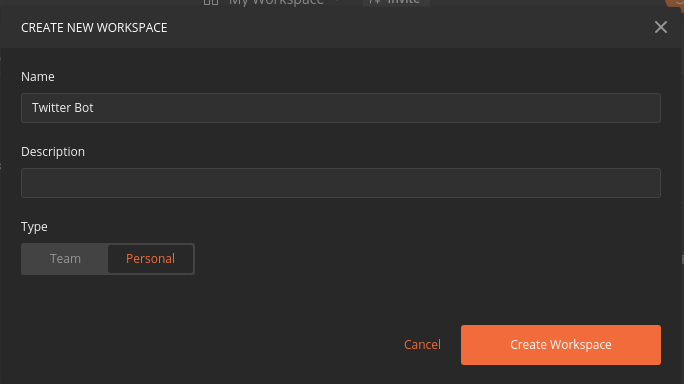
Here, In this workspace, we will write our JavaScript code and call different Twitter API endpoints.
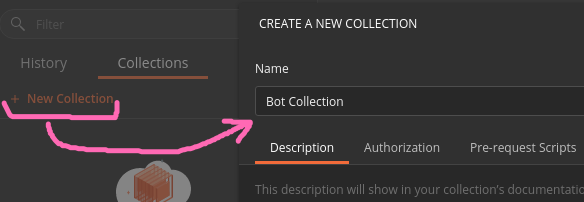
Create a Collection
Now, create a new collection inside our workspace and name it whatever you want and then click on the Create button to create a new collection.
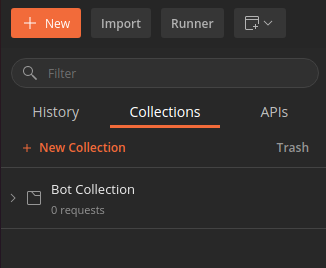
It looks like this
After that create a GET and POST folder inside our collection. Hover over the collection and then click on the three-dot icon and select Add Folder option to create a new folder. Inside these folders, we'll save our HTTP requests.

Generate a Twitter API Keys
First, head over to the Twitter developer portal and click on the Apply for a Developer account button. After logging in to your Twitter account. You'll see a window like this.
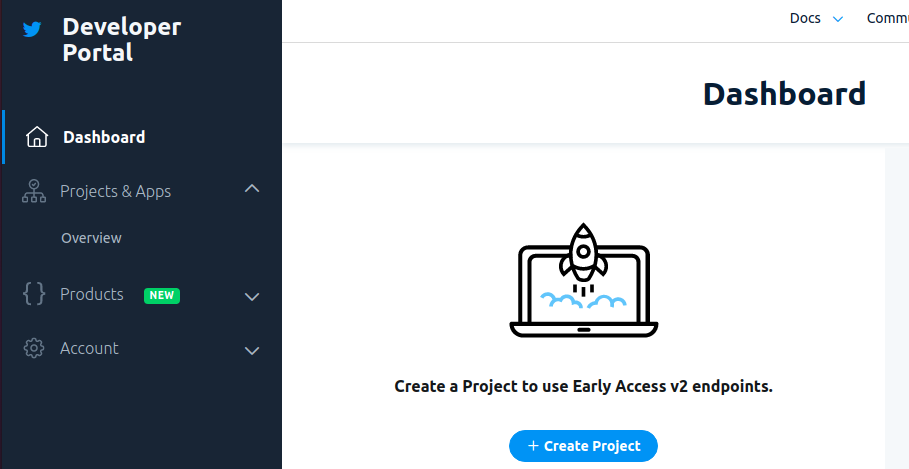 Click on the Create Project button to create a new project.
You'll need to complete 4 steps to create a new project.
Click on the Create Project button to create a new project.
You'll need to complete 4 steps to create a new project.
- Step-1: Give name your project
- Step-2: Select an option from the given choices that best describes your project.
- Step-3: Describe your project
- Step-4: Add your app, click on create a new app instead and name it, it should be unique, and click on the Complete button.
Now, copy your API key and API secret key, save them somewhere.
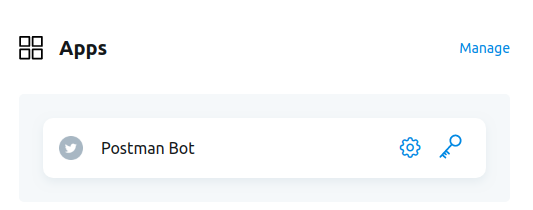
After that click on the App Settings button and then click on gear icons.
And then click on Edit to change the permission
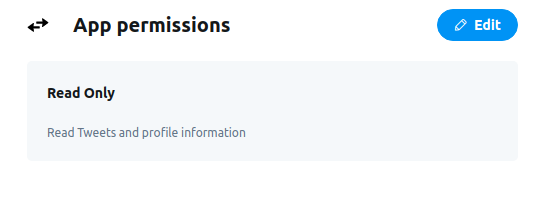
Change the permission to Read and Write and hit save. Now, click on Keys and tokens at the top, under Authentication Tokens, click on Generate to generate Access token & secret.
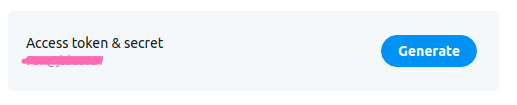
And then copy Access token and Access token secret and save them somewhere.
Now, You have successfully completed a basic setup🎉.
In the next blog, we'll start coding it and add functionalities like Retweet, Like and reply to a tweet.
Thanks for reading this blog
If you find the blog helpful, feel free to subscribe to our newsletter so whenever our new post goes live, you'll get the notification first.
Do leave your feedback or suggestions, I appreciate your honest feedback!.
Thank You


